 |
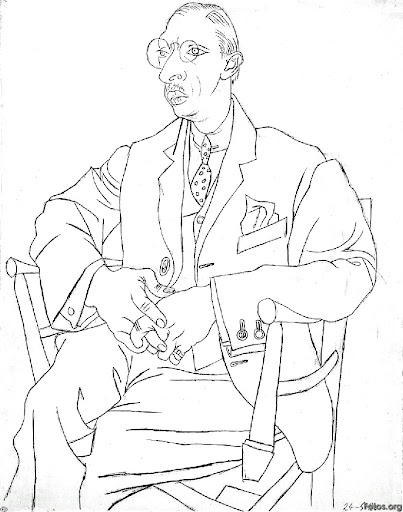
| Igor Stravinski, by Pablo Picasso - One of my favorite drawings, ever! See how few lines are required to draw a coat! Look for the shapes! |
1. PICK A SUBJECT:
SOO obviously, before you draw something, you have to know what you’re going to draw! Are you drawing your friend? An apple from your fruit basket? That jacket on the coat hanger? Or the neighborhood playground filled with kids?
Whatever you want (and remember, YOU DON'T HAVE TO CHOOSE because you can draw more than one thing in your life!), you first need to decide how you want to 'arrange it'. Think of it like when you arrange a room (yeah, I used a metaphor, what now?). You want the bed to go against the wall (DUH), but near the window so you can see the view. You want you bookshelf to be next to your bed so that you can take a book and read it without having to get up (FOR ALL YOU LAZY PEOPLE), and to maximize the space in your room. Likewise, let’s say you decide to draw the coat. Do you want to zoom out and draw the entire scene of the room with the coat, and in what angle? From above, level ground, or below? Do you want to maybe zoom in and just draw some of the buttons and part of the pocket? Decide and stick to it.
2.
BLOCKING:
If you start to draw the coat like an outline, you are bound to end up with an amoeba. Let's not turn this in to an abstract "as you intended it" it, okay? Instead, ‘block’ out your coat. There are most likely simpler shapes that make up this complex object. Find triangles, squares, diamonds and trapezoids (FOR ALL YOU GEOMETRY LOVERS!)—and think big. We don’t want you having eight shapes to make up the pocket. Block out your coat, and you should start to see the shape of it—make sure it doesn’t just look like a collage of shapes, though! (even if it was "as you intended it!)
If you start to draw the coat like an outline, you are bound to end up with an amoeba. Let's not turn this in to an abstract "as you intended it" it, okay? Instead, ‘block’ out your coat. There are most likely simpler shapes that make up this complex object. Find triangles, squares, diamonds and trapezoids (FOR ALL YOU GEOMETRY LOVERS!)—and think big. We don’t want you having eight shapes to make up the pocket. Block out your coat, and you should start to see the shape of it—make sure it doesn’t just look like a collage of shapes, though! (even if it was "as you intended it!)
3.
FLESHING:
“Blocking” was the 'official art term', but if you didn’t notice, I just made up “fleshing.” Anyway, now you want to flesh it out. Maybe part of one triangle doesn’t have such a sharp corner. (I mean, when does a coat really have a sharp corner...) Erase and soften it. Maybe you can join two shapes together to create the body. Erase and refine it. You should have a ‘contour’ of your coat with some important lines inside of the shape such as the buttons, pocket lines, and even some folds. Keep refining and refining this until you have the coat looking exactly as you like it. It has to be exactly the shape you want before you proceed on to the next step!
“Blocking” was the 'official art term', but if you didn’t notice, I just made up “fleshing.” Anyway, now you want to flesh it out. Maybe part of one triangle doesn’t have such a sharp corner. (I mean, when does a coat really have a sharp corner...) Erase and soften it. Maybe you can join two shapes together to create the body. Erase and refine it. You should have a ‘contour’ of your coat with some important lines inside of the shape such as the buttons, pocket lines, and even some folds. Keep refining and refining this until you have the coat looking exactly as you like it. It has to be exactly the shape you want before you proceed on to the next step!
4.
LIGHTING:
YAYY You’re now ready to bring your lines to life! If you look at some realism artwork, it doesn’t come out of the page because it's a pop-up... It comes out because it has depth created by a combination of tones (light and dark). So, you need to now choose your lighting. Bring a lamp or some means of controlling the light, and position your light to however you like it. Maybe you have it pointing down at the coat so that the buttons ‘look cool.’ Or maybe you just put the lamp on one side so you have a traditional look of dark on the left and light on the right.
YAYY You’re now ready to bring your lines to life! If you look at some realism artwork, it doesn’t come out of the page because it's a pop-up... It comes out because it has depth created by a combination of tones (light and dark). So, you need to now choose your lighting. Bring a lamp or some means of controlling the light, and position your light to however you like it. Maybe you have it pointing down at the coat so that the buttons ‘look cool.’ Or maybe you just put the lamp on one side so you have a traditional look of dark on the left and light on the right.
 |
| This is the range of pencils, by the way! |
5.
SHADING:
If you can, maybe buy some art pencils so you have a range of soft to hard pencils. This allows you to draw either with the hard, and therefore light-marking pencils, or the soft, dark-marking pencils. (I KNOW I SAID "ALL YOU NEED IS A PENCIL", BUT THIS IS STILL FALLS UNDER WHAT I SAID...KIND OF) It is highly inconvenient to create a third dimension with only one pencil. I would suggest you begin with a 2B or HB pencil and just lightly block the areas that should be highlights, the shadows, and the mediums. Every part of your coat should have a dark, medium, and a light. This depth is the "elixir of life" (another metaphor, SCORE!)—you can’t add a third dimension any other way. Every pocket, button, even fold in the garment should have it’s own set of dark to light shading. Keep the transitions from dark to medium to light smooth and seamless. THIS WILL TAKE A LONG LONG TIME!
If you can, maybe buy some art pencils so you have a range of soft to hard pencils. This allows you to draw either with the hard, and therefore light-marking pencils, or the soft, dark-marking pencils. (I KNOW I SAID "ALL YOU NEED IS A PENCIL", BUT THIS IS STILL FALLS UNDER WHAT I SAID...KIND OF) It is highly inconvenient to create a third dimension with only one pencil. I would suggest you begin with a 2B or HB pencil and just lightly block the areas that should be highlights, the shadows, and the mediums. Every part of your coat should have a dark, medium, and a light. This depth is the "elixir of life" (another metaphor, SCORE!)—you can’t add a third dimension any other way. Every pocket, button, even fold in the garment should have it’s own set of dark to light shading. Keep the transitions from dark to medium to light smooth and seamless. THIS WILL TAKE A LONG LONG TIME!
6.
I
forgot the name of this, but I’m going to call it CONTOURING:
This is when after you are ‘finished’, you take a slightly dark pencil (6B?) and you ‘outline’ your coat. Before you go and ruin your project, just sort of put a fine line on certain parts of the contour of the coat to redefine it. It adds a nice finish to your piece, and makes people say "WOAH."
"
This is when after you are ‘finished’, you take a slightly dark pencil (6B?) and you ‘outline’ your coat. Before you go and ruin your project, just sort of put a fine line on certain parts of the contour of the coat to redefine it. It adds a nice finish to your piece, and makes people say "WOAH."
"
 |
So, when I went to Tanzania for volunteering, I met this
kid, and I drew him. Ignore the face (faces aren't my thing!),
but pay attention to the wrinkles and folds in the garment. I
created basic shapes (lots of triangles!) and i added dark to
light on all of them, just like I instructed!
And for the record, this was also drawn on printer paper with
only one pencil...I WOULD'VE DONE IT PROPERLY, BUT
I WAS GOING TO PRACTICE ON THE PAGE, BUT
THEN I LIKED IT AND DIDN'T WANT TO START
OVER. AND ALSO, I GOT LAZY AND DIDN'T WANT TO GO GET MY ART PENCILS. EHHH, NEXT TIME? |
If you have highlights, erase away. It is okay to show paper! Also, your nasty, oily hands most likely picked up some of the graphite dust and smeared it all over the page. You can’t see the mess you made, but take an eraser and start erasing the white background around your coat, and you will see how gross you trule are. Erase all that smearing!
8.
SIGNING:
Sign your name so people see who is the artist of the masterpiece, and BOOM. You’re done. You can now call yourself an artist. Congratulations.
Sign your name so people see who is the artist of the masterpiece, and BOOM. You’re done. You can now call yourself an artist. Congratulations.
See!
It’s so easy!
P.S.
Don’t worry, I plan to add pictures later, and another blog post simplifying
this process with some priceless secrets ;) JUST WAIT!
One thing that I envy artists about is the "fancy pencil" they're using. I always saw them carried a box of pencil around and whenever I ask them "what is that"? They give me answer like "it's for lighting and shading". After reading your blog post, now I understand what they're trying to say. So, do you have a special case of pencil as well? Which one is your favorite?
ReplyDeleteIt's interesting to see such an analytical approach to cartoons. The step by step procedure makes it seem so easy and strait forward. I followed your steps, and my coat didn't look nearly half as bad as I thought it was going to. I still tore it up because it was pretty bad though. Baby steps.
ReplyDeleteVenky: You can get art pencils anywhere. I have a few sets, but the one I have been using is from London, and it ranges from 9B (the darkest) to HB. I don't have many light pencils because I never really had a use for it and did just fine with HB! Don't spend your money buying expensive pencils because some stores will try to rip you off-- want to know a secret? They're all the same!
ReplyDeleteDrew: For the record... and I can see why the confusion, I don't draw cartoons! I suppose I could, but I am more geared towards realist works of art. The photo above by Picasso isn't a cartoon either, although it appears that way, I suppose. It is actually just a different style where Picasso, when he drew the man Igor Stravinsky from life, he chose to select only the most crucial lines that would depict the drawing. I suppose I'll add a better picture so as to not confuse anybody else, but my point was just to show a simple picture of a coat where you could maybe find the shapes.
Also, I'm currently making another blog with a more visual step-by-step. Clothing can be one of the most tricky AND OBNOXIOUS things to draw. Each wrinkle, fold, and wave in the cloth has its own set of darks and lights, but DON'T WORRY YOU'LL GET THERE! :D